Two Years Getting Ready for the ARC 2013
We’re joing the ARC 2013 (Atlantic Rally for Cruisers). We have been following the 2011 and 2012 entrants at the ARC website. Many thanks to them for their insightful logs which have influenced some of ideas regarding preparation. And the 2013 entry list has been posted so departure is just around the corner.
So all we have to do is enter ARC 2013 waiting list…..and wait……..oh and also:
T-24 Months
Buy an ocean going boat and home
Preparations started over two years beforehand including the basics – finding the right boat was not so simple. Negotiations on the first boat fell through eventually – too many issues regarding paperwork and VAT potentially leaving us with a large worst case liability in an environment where all EU governments are starved of cash.

We then prepared to fly our ‘bare necessities’ to Portugal minimising baggage costs to collect and deliver back to the UK our second targeted boat but this purchase eventually developed into one where too many issues remained unresolved as to condition and inventory so we passed on this vessel although not before incurring the costs of flying out our surveyor. An owner toying with the idea of selling can waste a lot of energy but, were it our boat, we would have found it hard to part with.
and another similar boat caught our interest but the layout would have meant some big compromises
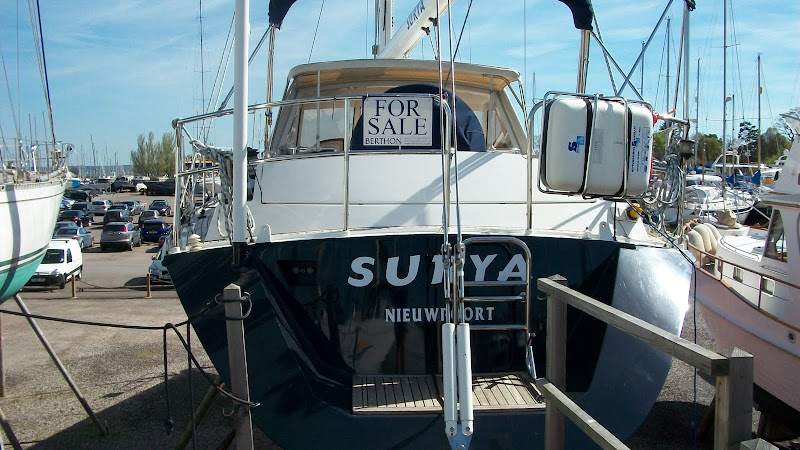
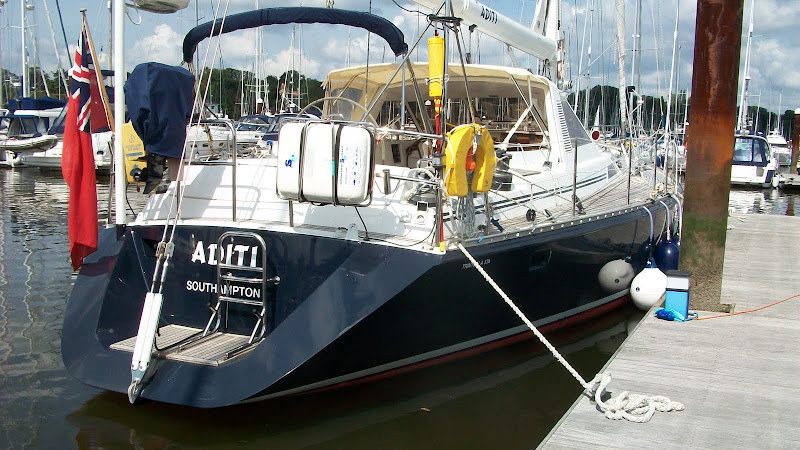
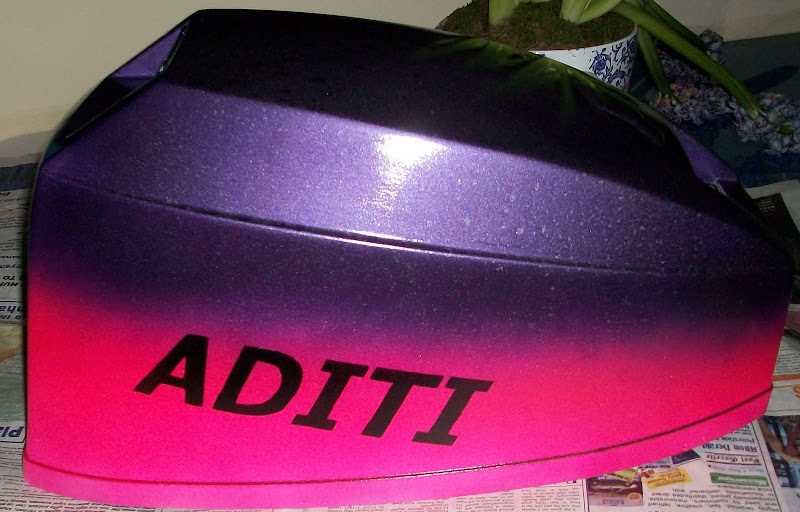
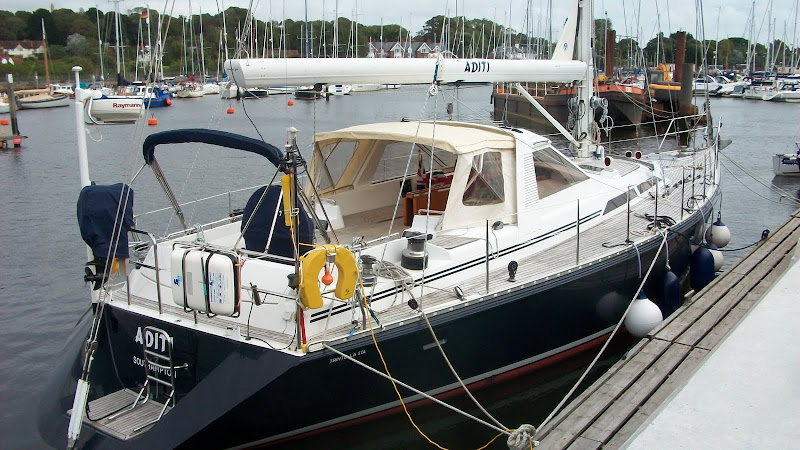
But Aditi (previously Surya) was an instant success, what a fantastic design (thank you Mr Van de Stadt) with everything wrapped up within days – so begins the work which this blog page captures in near realtime ie living it forward. We don’t know what we are going to find but we have a good idea of where we need to take it; there are plenty of decisions ahead.
Very smart to begin with….soon change that:

Anti-fouling


Anode checks – all 12 of them, at least that’s all we have found so far. A year later the count reached 15 after adding the prop shaft anode and eventually finding two on the bowthruster having dropped it before lift out. How to drop a hydraulic bowthruster powered by the engine once out of the water remains to be fully investigated).

Battery Bank check and renew several batteries
205Ah service batteries for domestic supplies
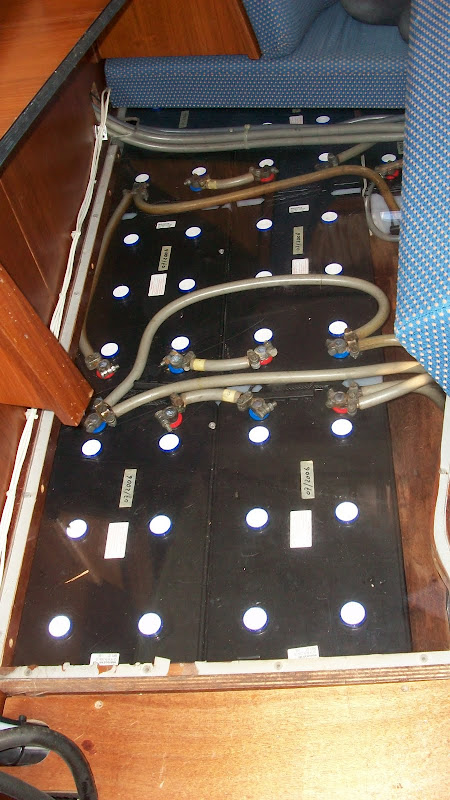
they still need load testing

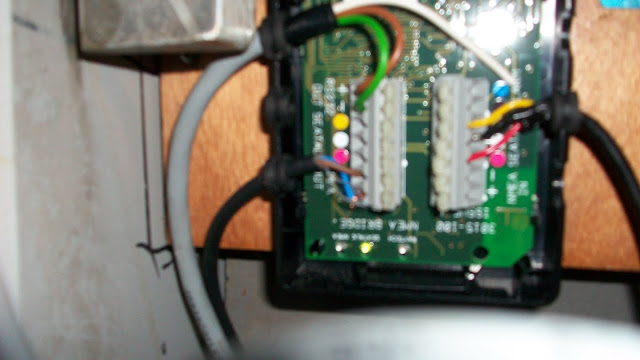
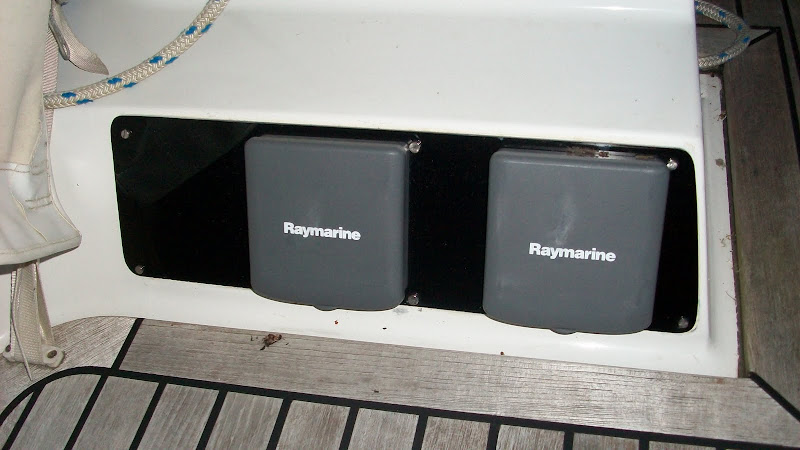
Replace All Instruments

removal of the B&G system


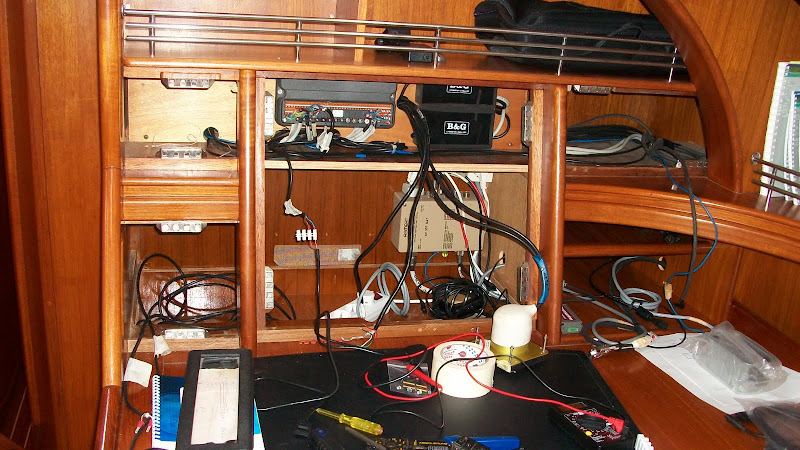
Re-using the former infrastructure – getting there as new installs are tidied up
and removing old SSB, Thrane & Thrane positioning system and SSB receiver

replaced with Raymarine…fortunately we had some teak veneer in the garage which has made for a good match around the instrument panels

tested in a bit of breeze

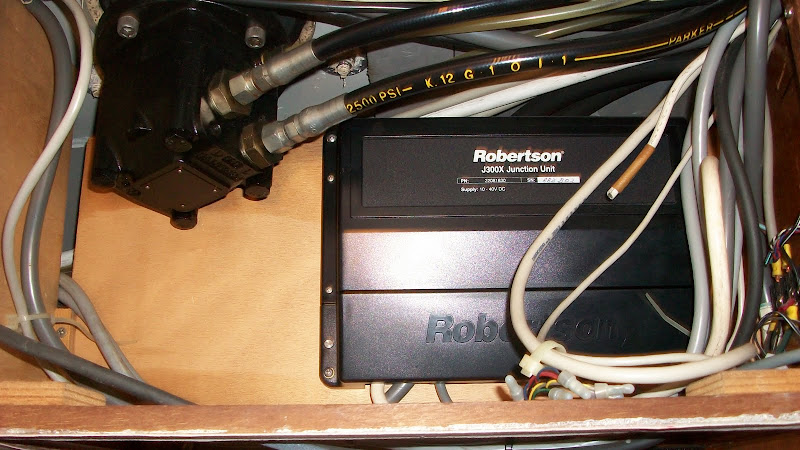
The old Robertson autopilot had to go as the heading control was worn meaning that dialling plus 20 degs sometimes resulted in a change of -15 degs the other way! The AP control head was also in the doghouse only and not repeated at the main aft cockpit helm. When sailing it took two people to operate the auto-pilot with a shout of ‘On’ or ‘Off’ between helm and ‘AP switch controller’ in the doghouse if the wind increased above about F4.
And time for a change of trim colour along the way:
and fitting a unit on the helm was one of the most significant upgrades enabling single handed operation under sail.
The original leather trim theme was maintained for some panels.

and the side panel pre-cut for an Icom SSB – hope Icom retain current dimensions. Looks like a football field of space for gadgets and switches

Renew deck level instruments and panels (initially polycarbonate which is awkward to shape; we then changed to black acrylic which we prefer as it offers a brighter finish) – before and after

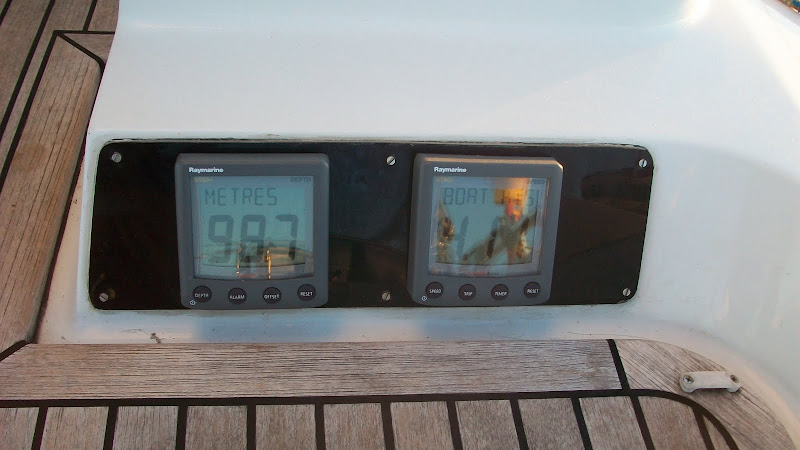
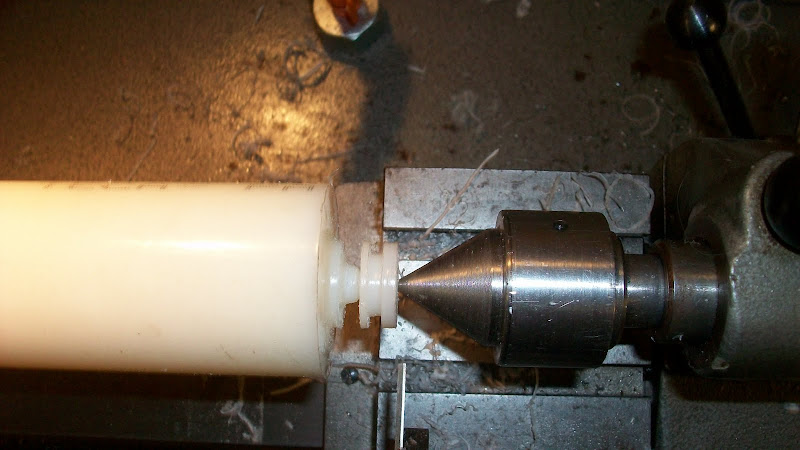
Change through-hull depth and log transducers

the fairing is re-shaped and depth much reduced as we return from old 3D sonar to 2D

to be epoxy primed and antifouled

After a year in the water the Iroko fairing needs an epoxy coating before anti-fouling – this can wait as Trilux loses effectiveness if left out of the water for more than two weeks.

Recommission engine & generator; well winterised so this took a couple of dats not being fully familiar with the machinery

Check the boat floats (after drilling holes in the hull this was the biggie!) and as we stared into the bilges around the transducers all looked dry – and felt dry to the touch – and was inspected many times until eventually the item was taken off watch

Add mast head wind transducers and add a Windex XL

cable running, drilling, thread tapping and aligning the Windex and wind transducer – what a leap forward to have wind info for the first time

and the mast head is more active with just the LED tricolour to fit

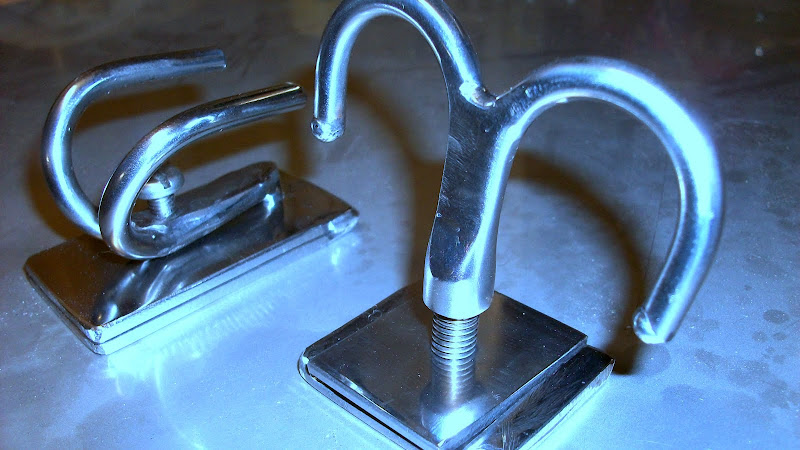
VHF Antenna
Fitting the first VHF antenna to be replaced, a new Pacific, as the original Metz was seemingly long destroyed by weather although it may be possible to get another coil under lifetime guarantee. It could be that the old one does in fact work but it looks like it has done it’s time. One to experiment when time permits.
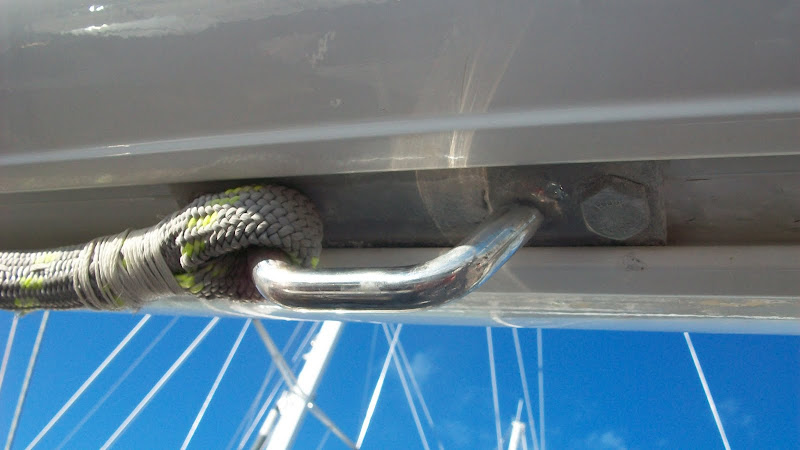
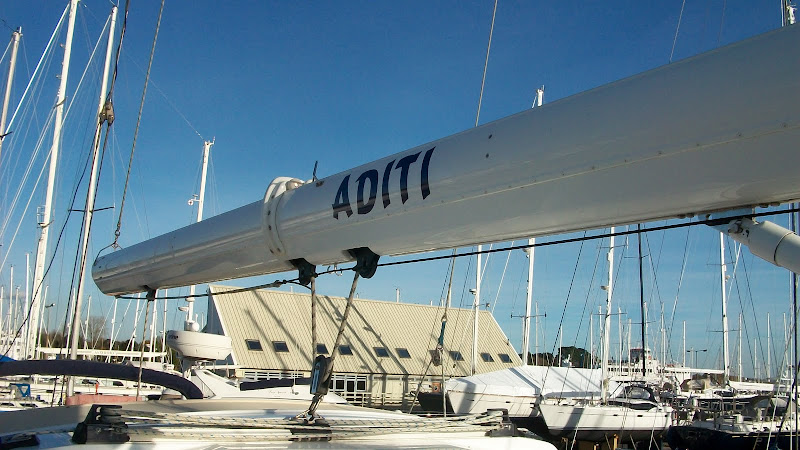
Change Name on stern and boom


Sew some covers, sprayhoods and lee cloths

T-18 Months
Replace auto-pilot system excluding drive unit

New units are of course smaller requiring some adjustments

The compass was a direct fit – only change is it’s now a white housing


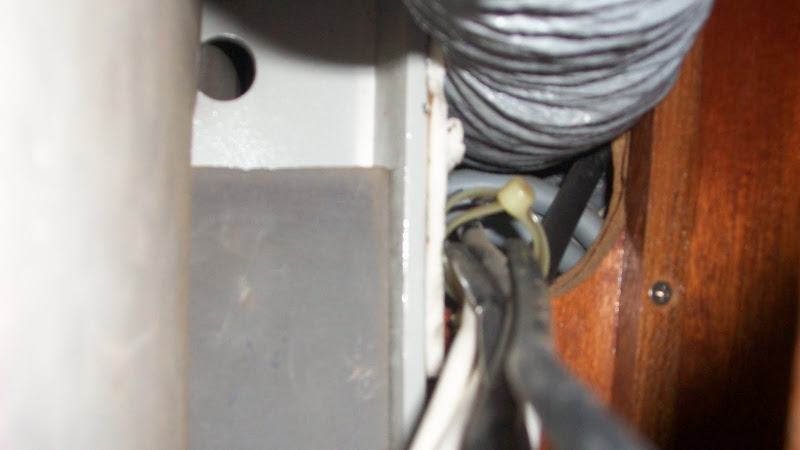
Much excess wiring could be removed as everything now goes onto the one bus
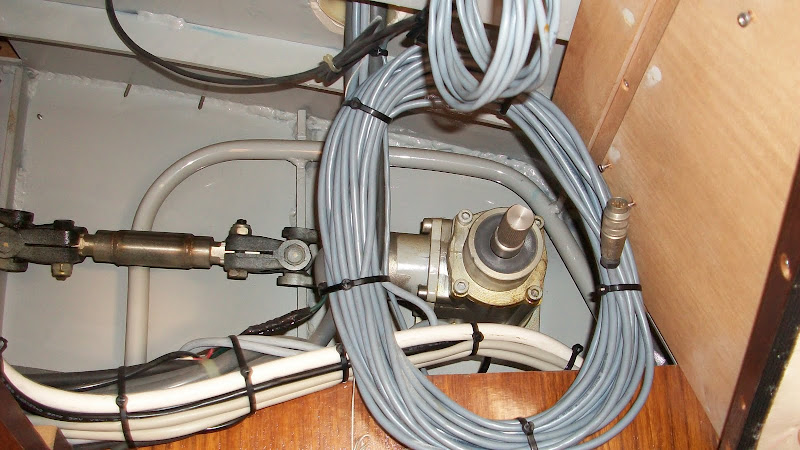
Old auto-pilot course computer connections

and the old control head
now updated with Simrad AP28

and re-fitted
Replace SSB

The old Skanti SSB removed and recyled via Radio Hams (control head, power unit and ATU)

running cables for SSB DSC
Fitting the Icom 801e SSB control head

Fit inverter for Chart Table 240v power

wired into 24v panel & breakers

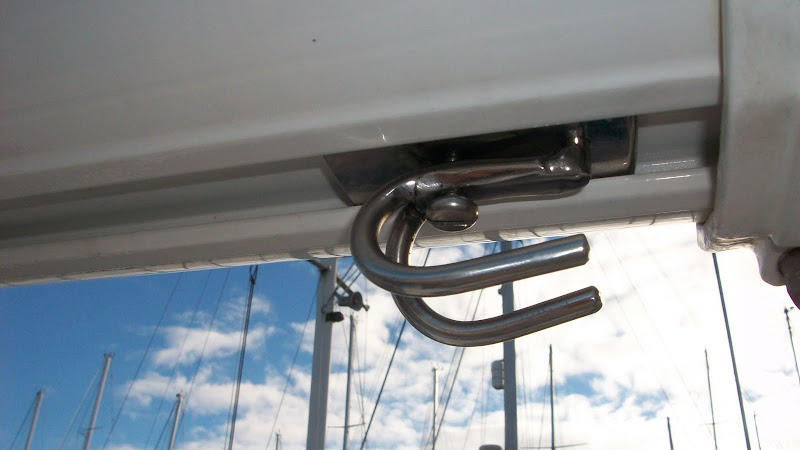
Mainsail Furling Pin
Replace the fractured Leisure Furl Ratchet (actually the fractured part is a KZ Marine, NZ customisation that failed). Without the hydraulic pin to lock the in-boom roller furling in place there is no mainsail furling!

Change Lewmar Air Switches

Remove old burglar alarm

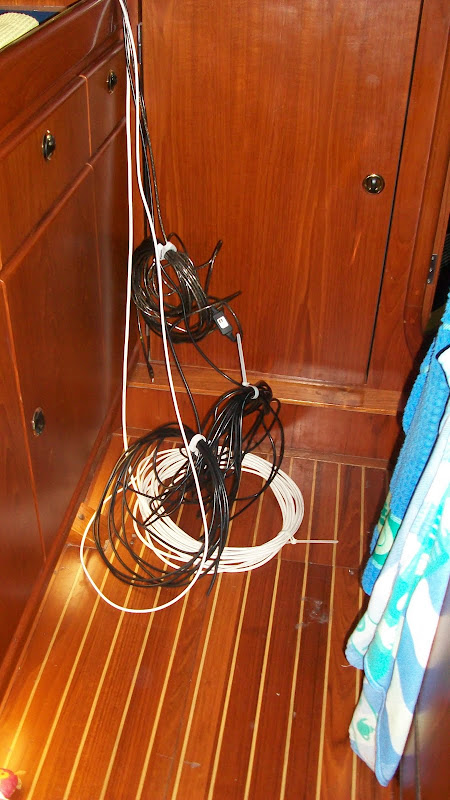
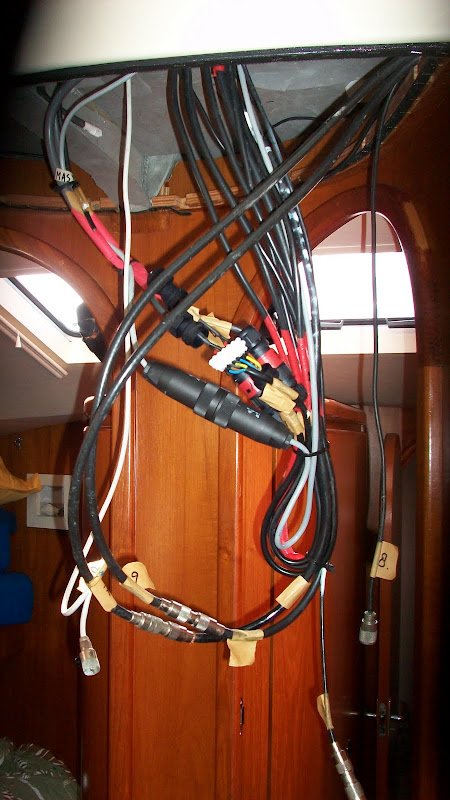
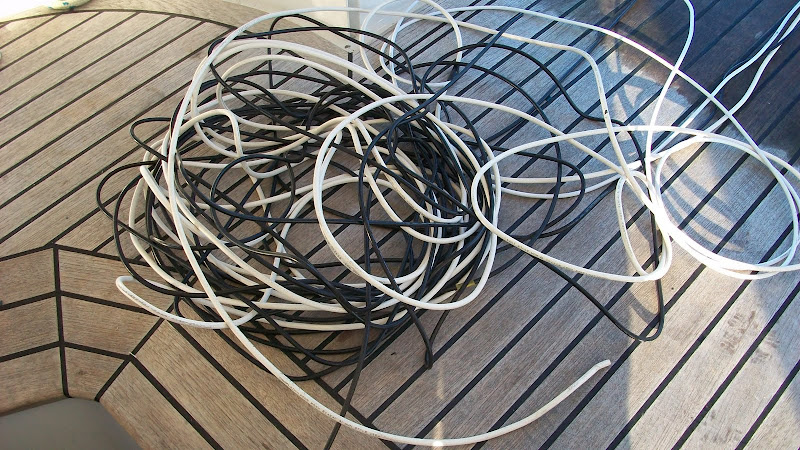
Remove oodles of old wiring
Interface DSC VHF/Plotter/Instruments/Autopilot/AIS via the Raymarine interface followed by a one to many Actisense Multiplexer which boosts and isolates NMEA 0183 to seven individual outputs so we have a couple spare – some spaghetti to sort out
We are running independent systems for all main navigation systems – there is no cross over between Autopilot, Marine Chart Plotter and World Charts so no risk of complex contamination of output data and three entirely independent GPS readings/displays. For example we had a Raymarine fluxgate compass suddenly reset itself 180 degs out due to a poor power connection and the conflict was immediately obvious.
Replace RR VHF Antenna with anything but RR and after trials we like Metz antennas which are fantastically well supported by Salty John. We are going Metz for second VHF, AIS and SSB DSC.
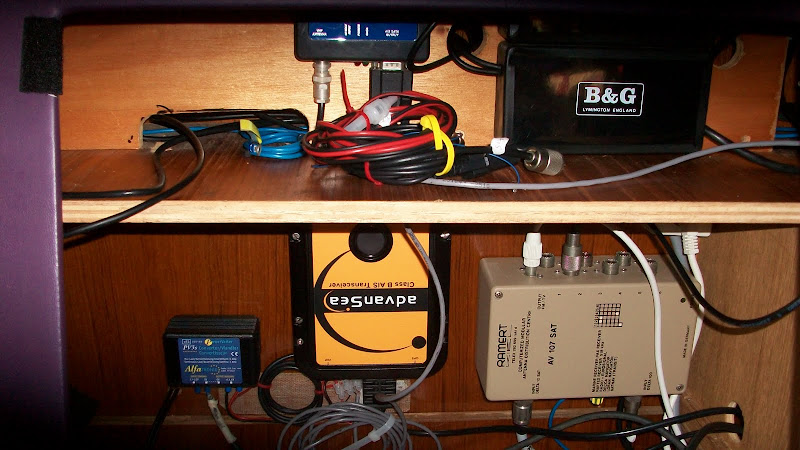
Add AIS Receiver, a NASA 3 – didn’t last long as a few weeks later we upgraded to JG Technologies supplied Advansea Class B transponder which has been excellent with the antenna at boom height

Check Stay
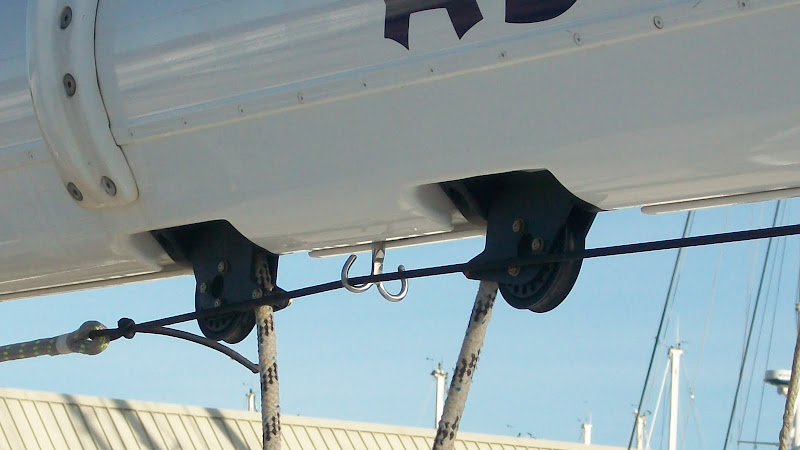
Add check stay inhauls to pull the blocks forward when not in use – the blocks need covers to protect the topsides

and below a bare checkstay and main halyard reach for the sky

Acquire world chart capability
Add staysail
Find a storm jib (our staysail will take us to 40 knots at 5.8% of foretriangle so we are looking for level above at about 3.25% mainly for South Africa). Our search for a used sail was miserable so North Sails are fabricating to order.
And add staysail tack
Add inner forestay stowage bracket on the mast

Add boom preventer bracket
Find a bigger tender outboard (and we elected to paint it….distinctive colours)
And a tender big enough to go shopping

T – 12 Months
We expect to leave our homeport in July 2013 so T-12 is coming up shortly….in fact it is now here already…and we must have spent many hundreds of hours on preparations and must be closing on the 1,000 hour mark. Double this for research into tools, products, aluminium hulls, suppliers, paints, sails, cat bowls…..
Splice and fit boom/gybe preventer
We are using a combination of blocks at the stern rail and lightweight thimbles at the bow to take the mainly static load which are spliced into a line which will run through the forward fairlead


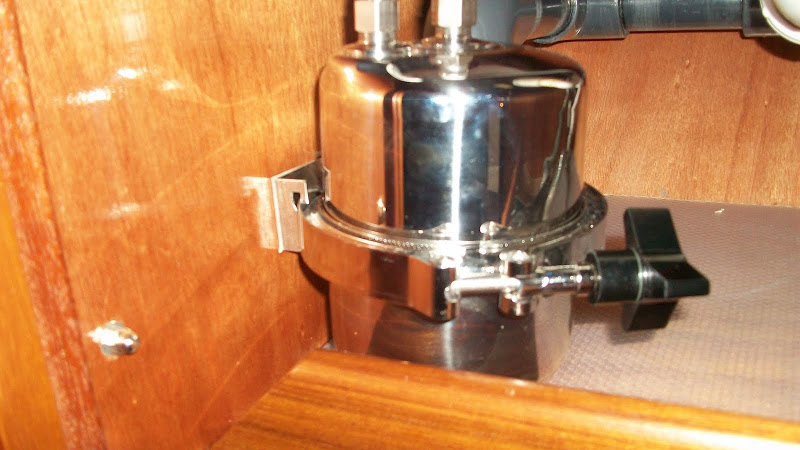
Fit cold water filter and tap
Excellent water quality provided via the Seagull filter and for the first time cool water became a sought after thirst quencher

the filter housing under the sink
Outboard Mount
Fit larger outboard, plus mount inIroko, all sheltered from UV
Rewire strobes and anchor lights – eventually establishing the former wiring chafed through at the spreader and mast exit points
Inside the mast – needing to feed through the conduits

Headsail Furling
Hydraulic systems maintenance – here lifting the headsil furling cap to grease the bearings and re-lock the bearing house nut – 90mm spanner anyone? – apparently a small job but had to learn several new tricks to get this done using backstay and spinnaker halyards to give extra forestay height before craning the furling foil up to the swaged end fitting.
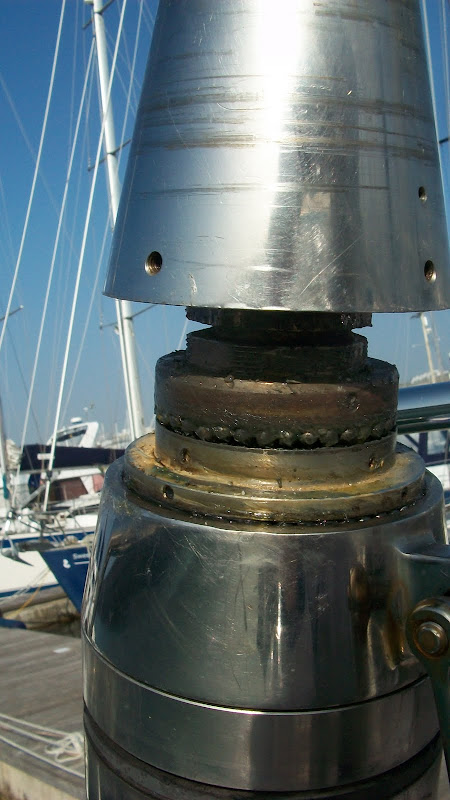
and now carrying spare bearings some of which need fitting as the headsail furling grease dried out and the housing opened out as well as then enabling some delrin balls to become crushed. The bearings are a 50/50 mix of 6mm 316 steel ball bearings with a crush rating of 2,040kg and delrin 6mm balls (much lower crush rate but the OEM’s are not heavier rated tolron)
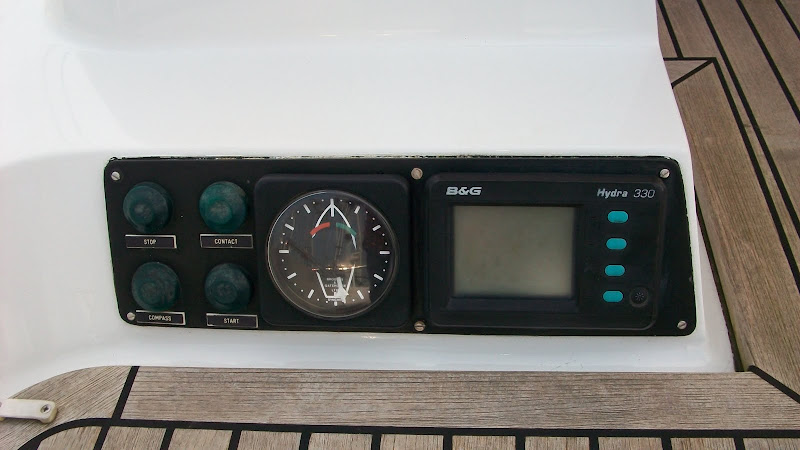
Deck/Helm Instruments
Fitting more instruments at deck level as the old B&G’s are long defunct with new replacement switches yet to be added – one ST70 needs a software upgrade to vers 3 so I have to pull it out again anyway not having a new generation E-series or similar plotter.
Before
Work in progress
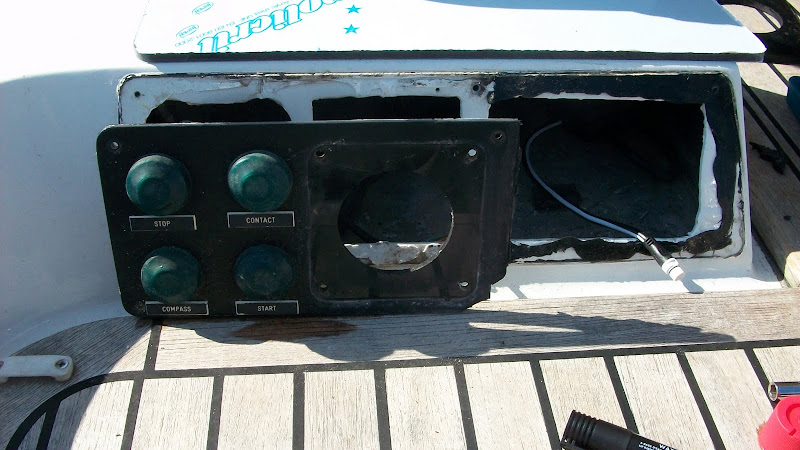
After, less switches to be fitted (for anyone with a Trintella seeking to retain the original green Hella switches we found these very hard to find and eventually sourced them through the German company www.seekpart24.com – we stocked up with a bucket load)
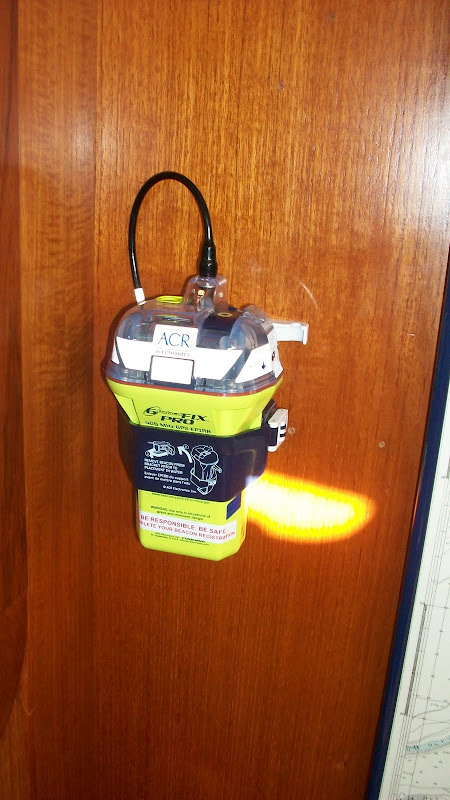
EPIRB
Starting to become ARC 2013 safety compliant with the EPIRB in place
Need to add name and reflective tape to lifebuoys
Refurbing the sprayhood – lining up the 15 zips (size 10) that go into this!
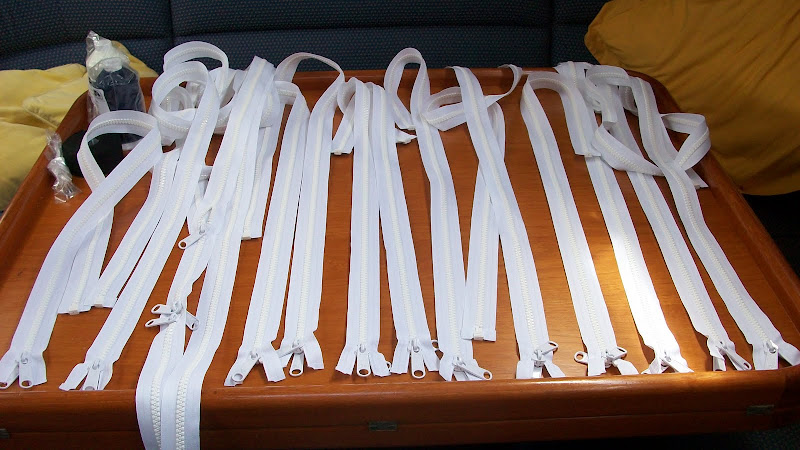
One down…adding zips is no problem but unpicking the old aluminium based zippers that bind in the salt spray is very time consuming. The risks of needing a line of stitches in the hand increases dramatically as the unpicking tool slips or cuts. Sewn with V92 thread using a Sailrite.

Sewing a sprayhood in the saloon clashes head on with lack of space
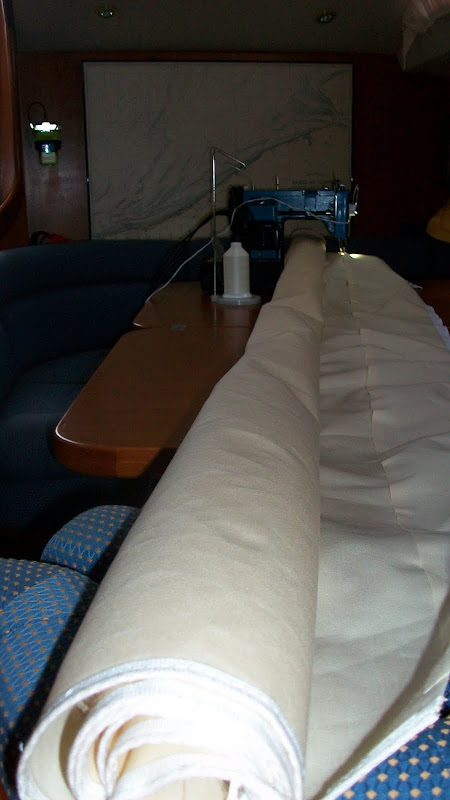
Getting there – still the aft to line in vinyl….the dip on the RHS has been adjusted

T-10 Months
It’a a shame to be out of the water at end-August but this was our plan so we are staying with it. A final push to get things done boat-side before packing up life onshore. Difficult to believe that we have got to this stage already but we continue to feel that we are slightly ahead on fit-out. It has taken an age to source parts but we are now carrying numerous spare filters of every kind, wiring, connectors, single braid line, pins, fuses, shackles and so on but there is a real need to inspect, log and remove these from precious storage spaces.
And there are set-backs. This time the heads are complaining with blow-back, flow-back, some flooding and general noise; it started with one and spread in varying degrees to all three. Combine this with the ongoing Battle of the Bilge in which fore and aft refuse to give up their hard collected waters and we have a party below the sole to quell. Several varieties of pump have been assembled!
The sails are off and we will take these away to inspect and service them. We can transport the genoa between us but lifting the main is challenging for a couple. We will have to use some ropes and levers to get it into the car – if it fits at all.

Fit watermaker – we ordered this in March 2012 and it has yet to arrive as of end-August so it was a good thing to get in early. It was a special purchase so we are not yet troubled by the timing and we don’t need it to arrive for some months yet.
Fit second VHF Aerial from Metz (a fantastic antenna from Salty John) – this is in place after removing the old Inmarsat antenna but it is only a temporary fitting. We are thinking of fabricating our own mount in 316 steel so we will see where we get to.
We need to sort out clips to keep our saloon furnishings in place as these were removed in a previous life and we will otherwise be flying across the saloon clutching half a bunk with the rest not far behind.
We are still at Month T-10 and this month seems to lasting out well job-wise. We are out of the water for the last time, just as days of endless sunshine turn up, but we are sticking to our plan. Sails are off, rigging stored away, and the winterisation process has started. Lots of white vinegar is being used to clean plumbing.
The underside looks good. The paint work is intact after 14 months. Zinc anodes are a concern with most having turned passive with a white coating possibly from being up a river for 3 to 6 weeks (depends on what you count as river and we don’t know the salinity levels). Four of our 15 anodes have taken the punishment; shaft, rudder, bow thruster and one large disc ZD-55. So the issue is how to clean the surface of the others to refresh them? We are experimenting.
T-9 Months
Zincs are driving us crazy. After hours of searching for options the only replacement zinc we could find was the ZD-55 but the diameter is about 4mm oversized so does not fit the hull recesses. Another job for another day! In the meantime efforts to recover the existing zincs that were previously oxidised have gone well. Below is an oxidised zinc sitting on top of a new ZD-55:

And the plan is
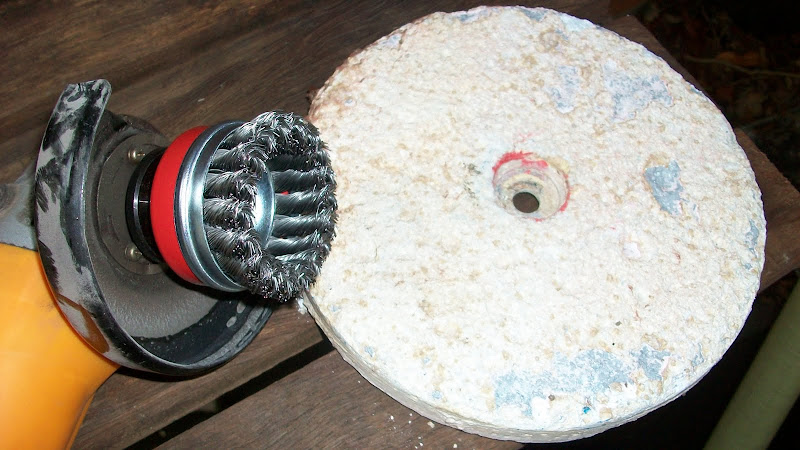
which delivers a good clear zinc finish although not bright polished so these need to be weighed to check on degradation:

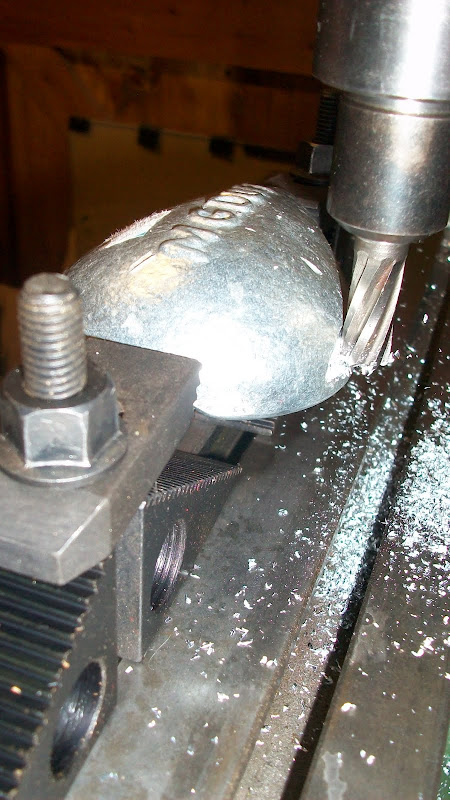
New bowthruster anodes eager to cross the Atlantic – but too wide to fit straight out of the box!

Then quite by accident I cam across the ZFD-7500 from Hulldown which looks like a real contender and well worth researching a bit further. But in the meantime the tedious job of skimming standard anodes to size is on the mill;
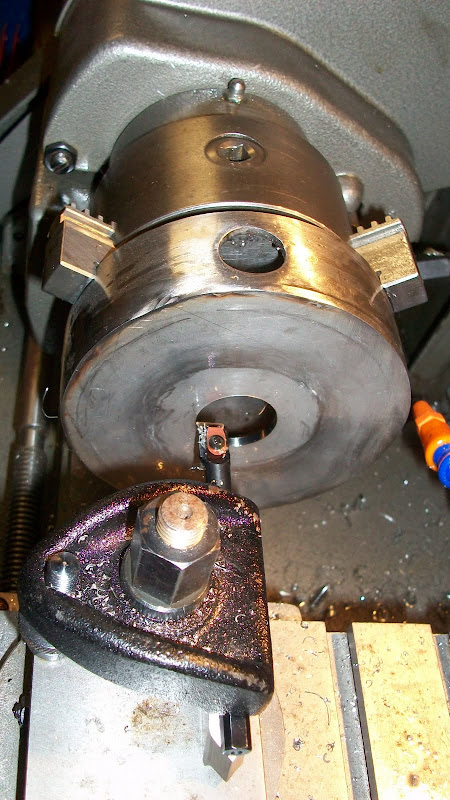
Anode Gate
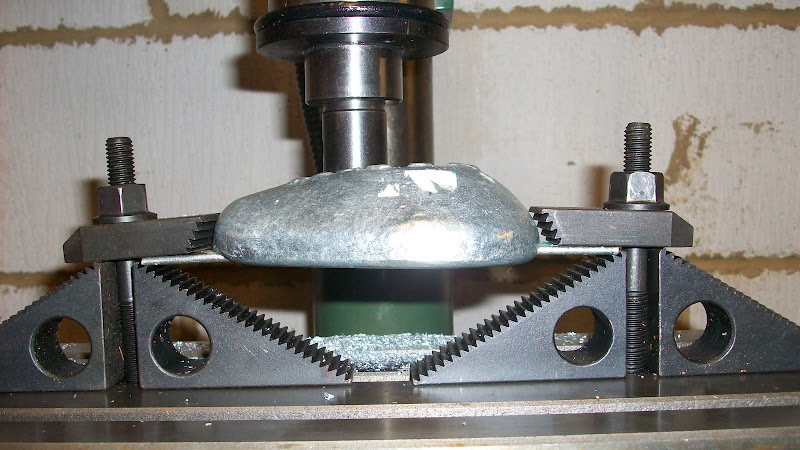
Anode-r one bites the dust
and Anode-r one gone (here being fly cut – note need a larger lathe – taking a while to get the right speed and feed as well as cutting bit)

Anode-r one gone (cutting cleanly with high speed and WD-40)

Skimmed alive – been snowing zinc in the workshop

this is turning out to be Anode Month; 10 cleaned, 3 new, 4 milled to fit with 2 large discs retained as spares.
More red LED lighting in the saloon for night passages

Cruising Chute/Bow Roller Pin
Thread cutting the 12mm 316 steel round bar cruising chute pin that passes through the stem replacing the previous one which was bent:
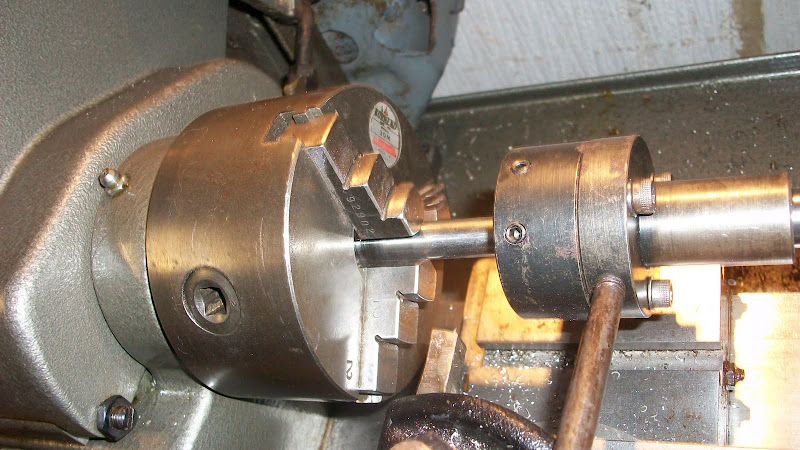

the finished pin
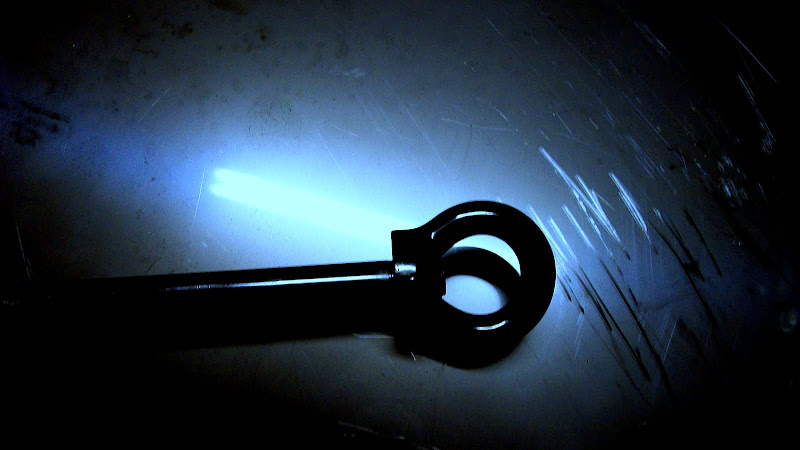
back home through the anchor roller

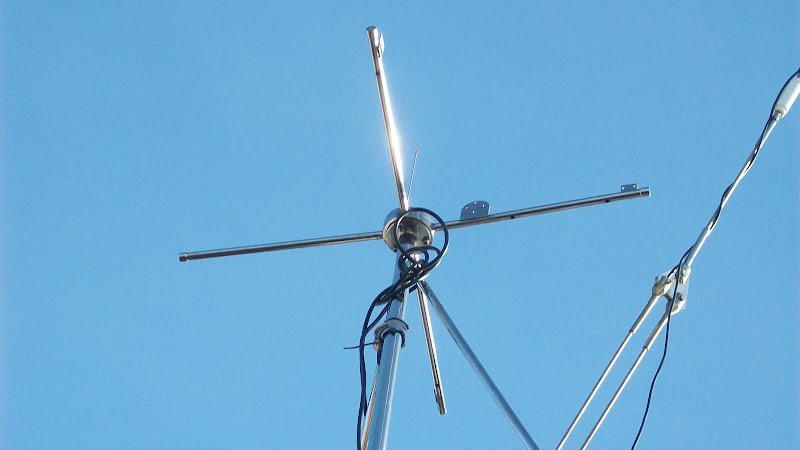
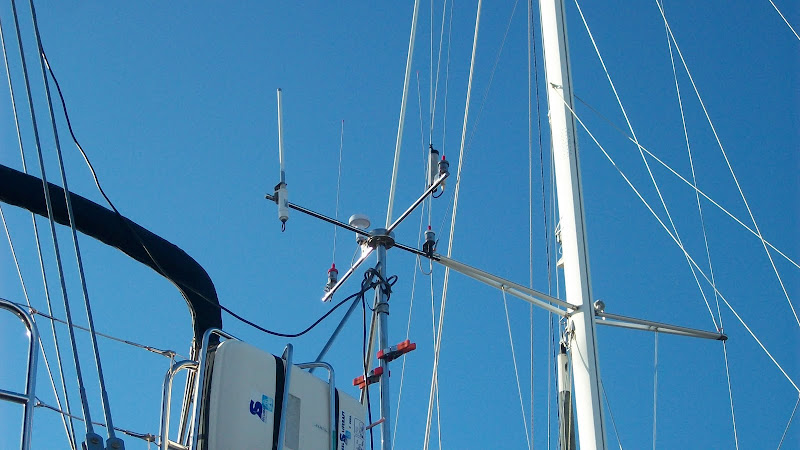
Antenna Tree
Build an antenna tree for AIS, back-up VHF and SSB DSC – Adding the Metz DSC antenna for SSB – now starting the build of the rear antenna mount of 316 4 inch steel pipe with the first lathe operations to true up the 110mm diameter hub

Making progress on the hub
now for the mount opening starting with a 15mm drill
Boring! Carbide tips are great….
The antenna tree starts to take root as first fitting commences
Welding thin wall tubing was a nightmare as the 20mm 316 tube would easily blow out with 2mm 316L electrodes. The situation was improved by raising the ampage/heat. What looked like an afternoon job turned out very differently.

Aligned using transfer punches, tapped and bolted
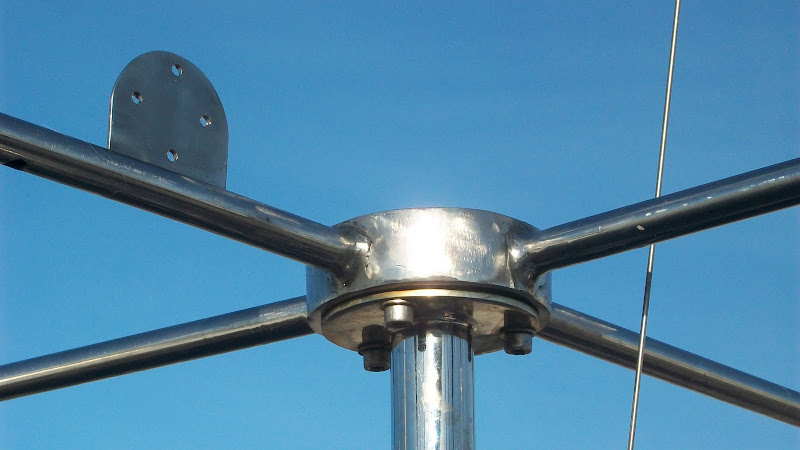
Looks reasonable but concern that one arm hangs outside the rail
better put something on the tree – line up the tubes

bolt on (for ease of maintenance although we finally switched to welding on the mounting brackets)

and shortened the starboard arm to keep it within the rail on the quarter

Now in place AIS, VHF and DSC SSB

Adding Alfa WiFi
a worms eye view

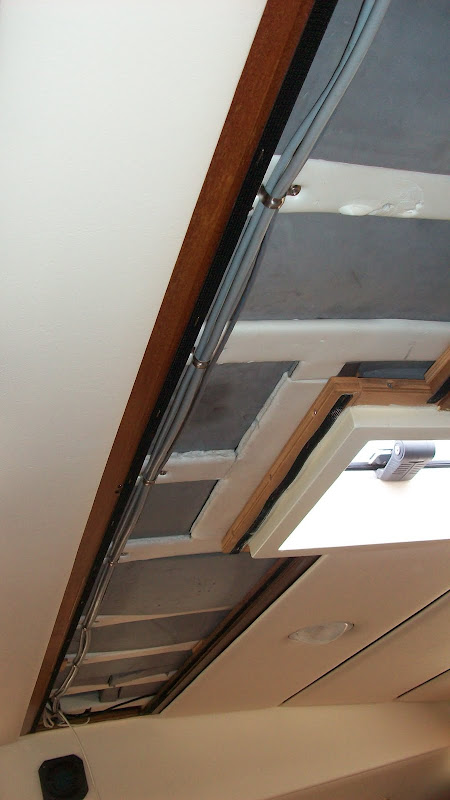
Getting ready for the 80m of cable runs from transom to chart table and 40m running back the other way

Preparing for the cable runs after fitting the deck gland
In goes the cable gland. In a moment of weakness this was purchased as a manufactured part when we should have made our own given that we have all of the required parts in stock and we could have custom fitted all of our cables into one gland with minimal intrusion into the deck and with a lower profile. The adverse effect of time pressure! Once all cabling requirements have stabilised this will be tidied.

Approximately the equivalent 120m of obsolete cabling was extracted first allowing original cable routes to be run
Half way there (one picture but 2 long days of hard work) and being careful to limit the coiling and tangling within and across cables
And at last 24 hours without wiring

We could not get the SSB to interface to the existing NMEA bus nor to AIS GPS so yet another GPS unit has appeared on the ‘last resort’ list. It might be an NMEA Vers 2.0 to Vers 3.1 issue? The issue was discussed with Icom, Actisense and Sail.com and nobody could reason why the required NMEA sentence ‘GGA’ for location was failing to show at the SSB display. Much reading of blogs, instructions, NMEA protocols followed. We changed everything, re-wired this, tested feeds into that and although all seemed fine it would not work on the SSB.
Several weeks later after generally pressing buttons on the SSB then moving onto something else. Then, looking over the instruments et voila the full GPS data was displayed. Something we pressed? Yes it is the Chan/Freq button which displays or hides position. Now our mistake is clear and we can revert to type; never read the instruction manual!

Intermission: Annual Winterisation 2012 – not the greatest job but somebody has got to do it!
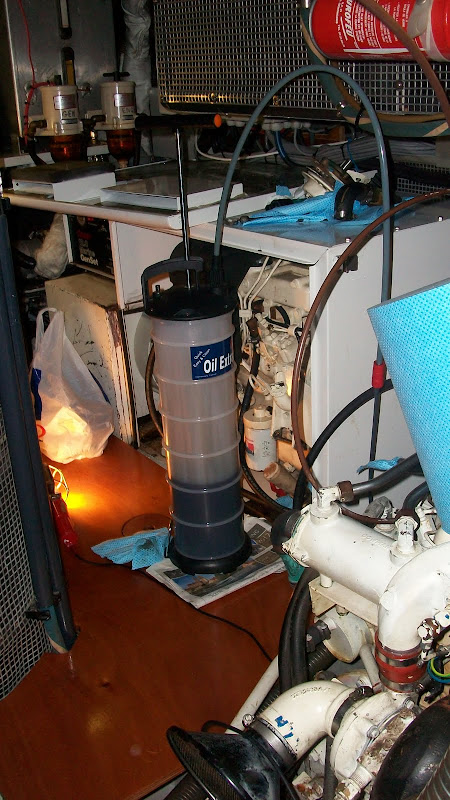
Oil and filter changes
Sediment
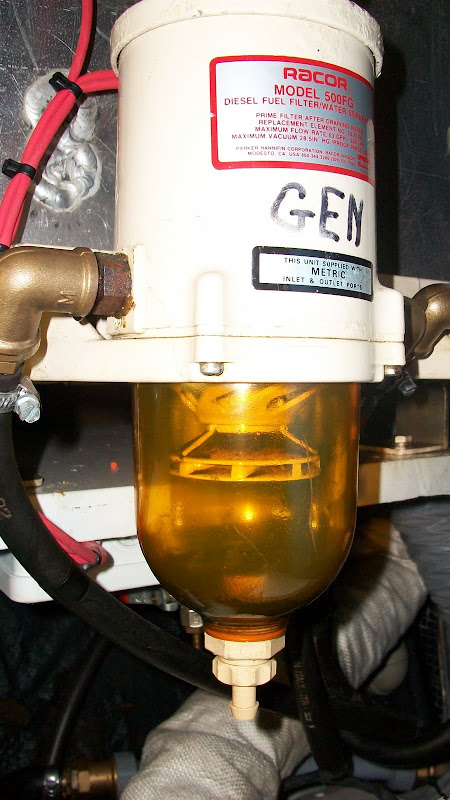
After about 50 hours run time it has spun some dirt out of the fuel
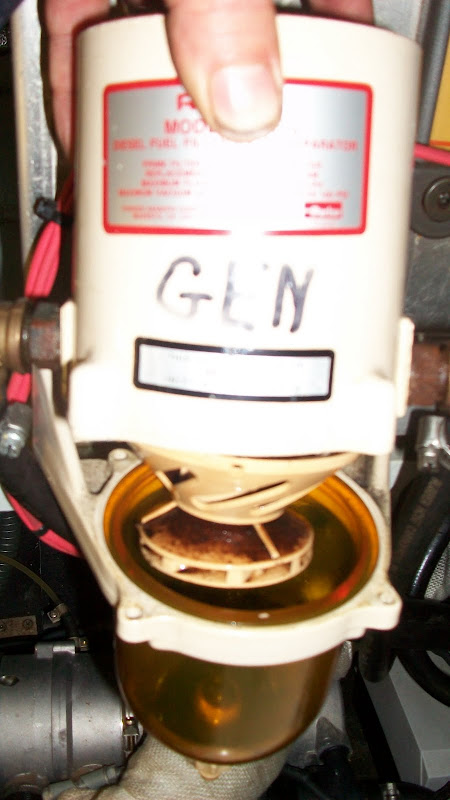
Old filter
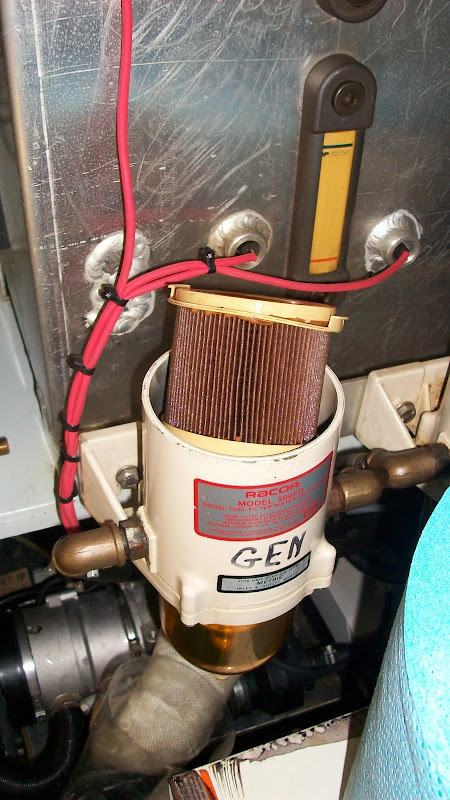
The Racor carcass

New filter

Ready for a trip to Las Palmas but better clean down the day tank as well

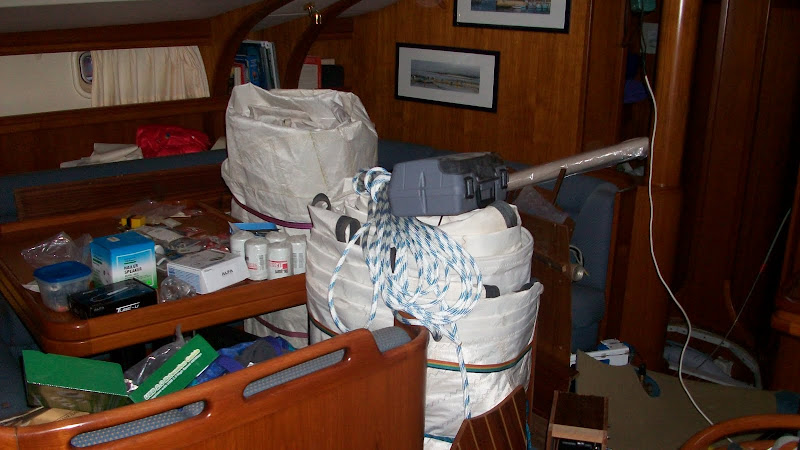
Refit mayhem….
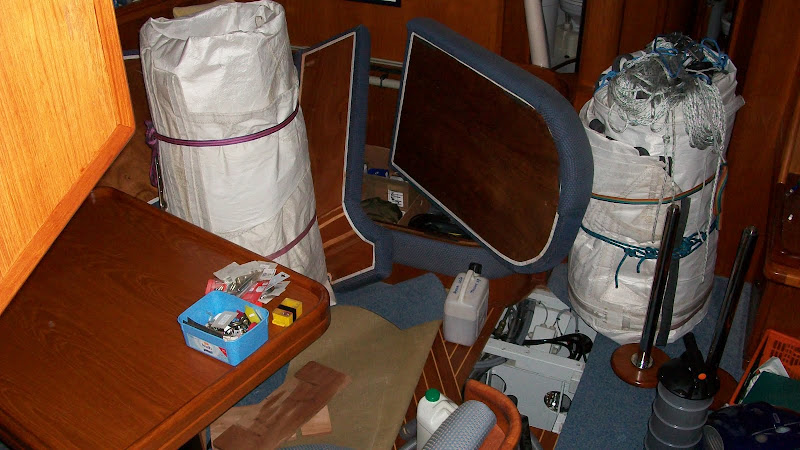
and gradually this has got worse with multiple projects on the go from SSB to foghorns, WiFi, alarm systems, vinyl replacement, watermaker; it’s all going on.
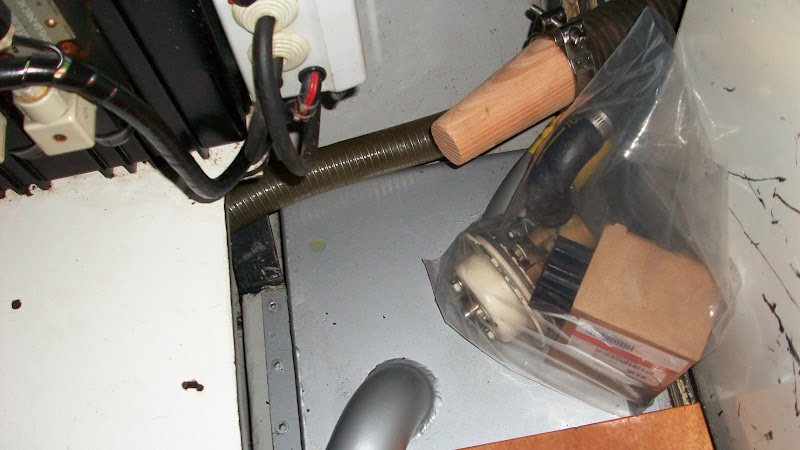
Cleaning the raw water strainers

T-8 Months and the pressure is still on every weekend and weekday evening…can we have another 12 months please….just hold the ARC a minute!
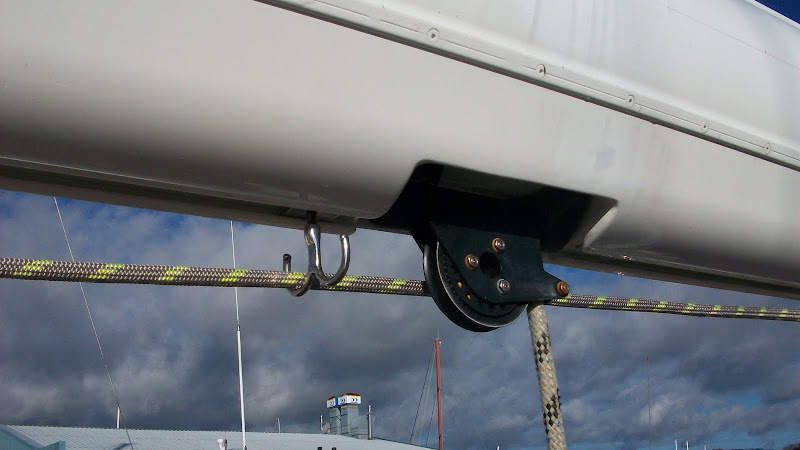
Refit rope clutch:
This old rope clutch is missing some components and a close match is proving difficult to come by. We will machine our own replacement parts which is far more economical than replacing the whole jammer.

Christmas candle?

Turning a dome plug from nylon 66 stock for the D2 clutch from 48mm down to 20mm – wish we had a wider range of nylon stock
The rebuilt clutch

fully sprung again

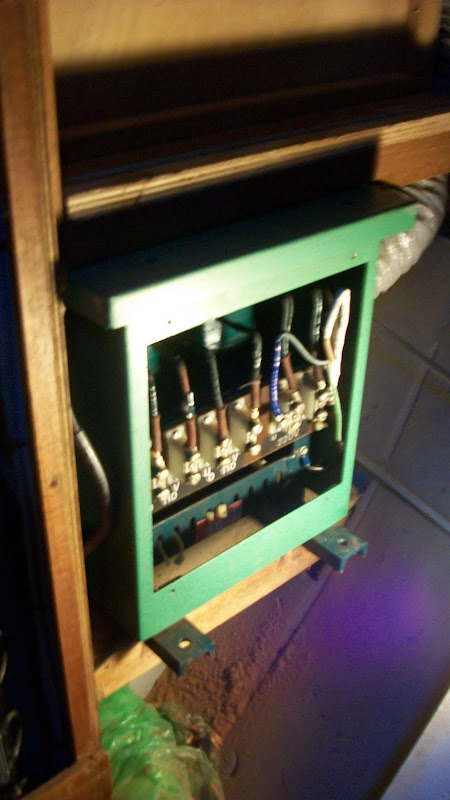
Isolation Unit (Shorepower):
The shorepower Isolation Unit – this rebuild has been on the list for 18 months as the cooling fan bearings have gone – trouble is the boat was built around it! Having removed most of the starboard site joinery we are left with some tough choices regarding extraction – cut out and rebuild?

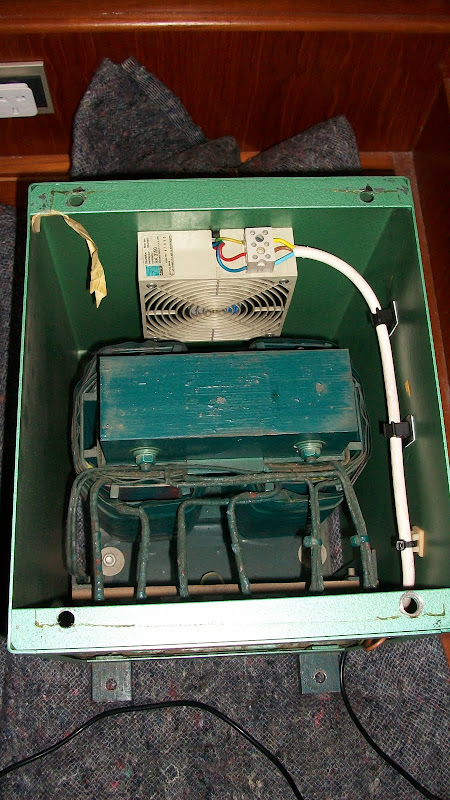
Of course the cooling fan – the only moving part – is completely inaccessible as can be seen at the back so the unit has to be removed a boating headache. The unit is barely accessible down the starboard side, hardly reached at the rear, impossible to port and from above. It sits on tall studs that are built in at the front and locked by nuts at the back so this is a puzzle.

After a 24 hour siege the very built in and heavy Isolation Transformer walks out ready for a fan change
No more shake, hum, rattle and roll

Re-fanned and ready to go with the reverse 24 hour rebuild averaging about 1.5 hours per bolt using numerous tools and lots of boat yoga
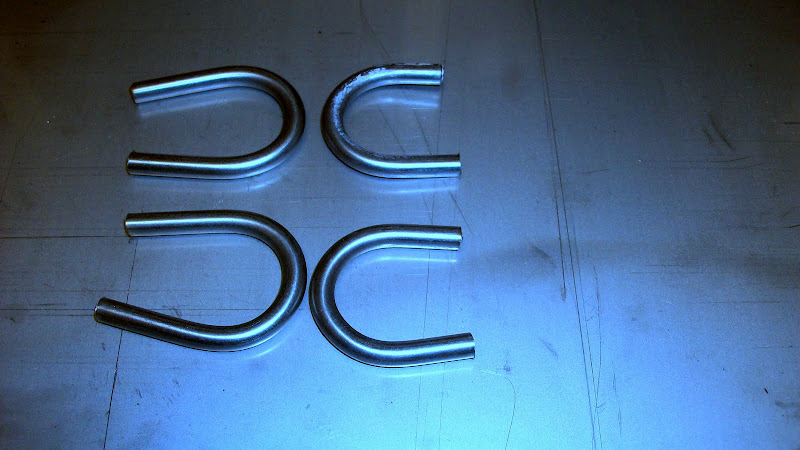
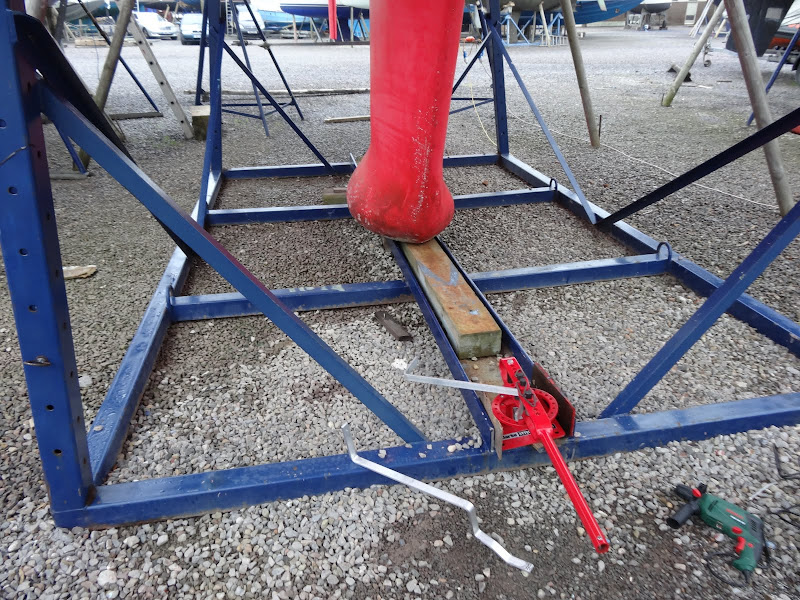
The Boom Preventer – stowage refinements
The boom/gybe preventer was installed last summer and stowed along the boom with bungee cord. When the wind gets up on the beam the 12mm dyneema line although taught slaps on the boom so we are making some stowage hooks to hold the lines in place as a cure – first the bending of some 6mm 304 (we had 304 in stock & hope it will hold up well in salt air) into a few hooks:

Designed to avoid any stress on the boom’s paintwork in the underside track the mid-boom hooks have a backing plate against which the M10 threaded hook will apply pressure (locked in place by a locking nut not shown) and the forward hook has an M6 bolt which opens the welded steel flap in the track to lock it in place. We will see how fitting goes and whether we need another support along the 7 metre boom.
With a countersunk hex bolt this will be finished:

The mid boom support concept will have to be changed so it’s back to the workshop on this design for a bit of modification

too large and too loose – excellent for clothes hanging though
A couple of adhustments to the loops and centre shaft and it’s looking better

Design Mk II preventer stowage hook

But Mk 1 adjusted makes a good retainer
so is fitted between two mainsheet blocks
At this stage we are north of 1,500 hours of prep work and the remaining works list seems as long as it ever was:
Webasto Heater
Big on personality it always has something to say. Every winter it packs up and then come the hottest days of summer we find the battery charger tripping out because the heater has come on and the engine room is sweltering.
Replace Webasto heater temp sensor? Thankfully not required as some coolant had crept down the sensor’s wiring insulation and was shorting the sensor so after some boat yoga and testing connections/resistance levels we abandoned the re-fit of a new sensor and cleaned up the master plug – after an hour or so we had heat everywhere except the saloon and galley – another hour and eventually located a loose wire in the room thermostat.
Ha! Heating packed in again due to over heating. From cold it ran for about an hour then hit the same problem. Could be an air lock somewhere but really don’t have the time to chase after it. In any case with most cabins stuffed with dismantled bits of boat it’s impossible to get around the system.
Month T-7
Month T-7 equates to about 66 available days of boatwork which in boat work days is very little time to become ocean ready. 500 to 800 hours but that includes packing up shore life.
Pan Holders
Making pan holders for the cooker is an entirely bespoke job when your galley is fitted with domestic hobs rather than a purpose built sea gowing stove
Building up the 6mm 304 steel arms of the pan holders

Starting to take shape and due to be fitted with a central dividing bar to support the arms but a short sharp 90 degree bend at the tip of the arms will be a challenge.

some height into it now as the mount is attached

and the (highly recommended) pressure cooker has a fitting before the holders go through a final bend and the whole grid is welded up – the first two ‘fingers’ are committed and bent over the loose centre bar. Life will be much better when this is in place and although we lose flexibility at least the kettle won’t be flying around the galley anymore.

The final bends complete and central support bars added

And ready to attach to the cooker

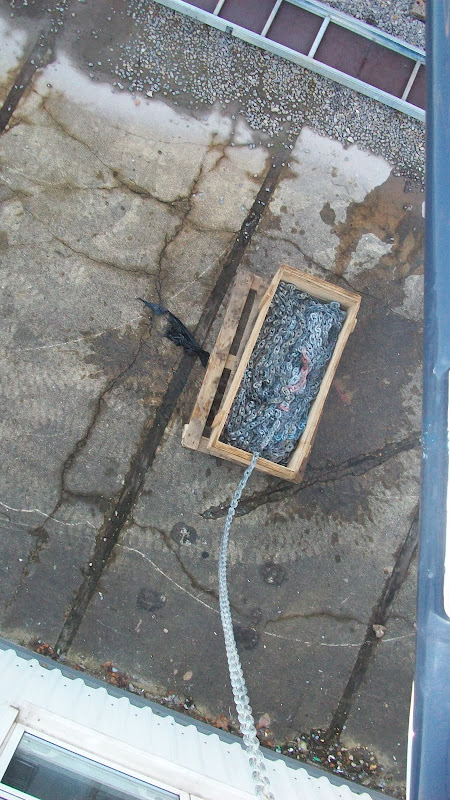
Primary Anchor Chain
Anchor chain extension to 100m arrives
Does the anchor locker take 100m? Not initially as the locker fills to the deck with the last 15m still to load. But with 50% extracted again the first 50m flaked down manually to prevent castling below the hawse pipe the chain loads readily
Fit SSB
At least it is making some progress toward the boat and it’s just a small matter of transferring the boxed item to a permanent home within the hull somewhere
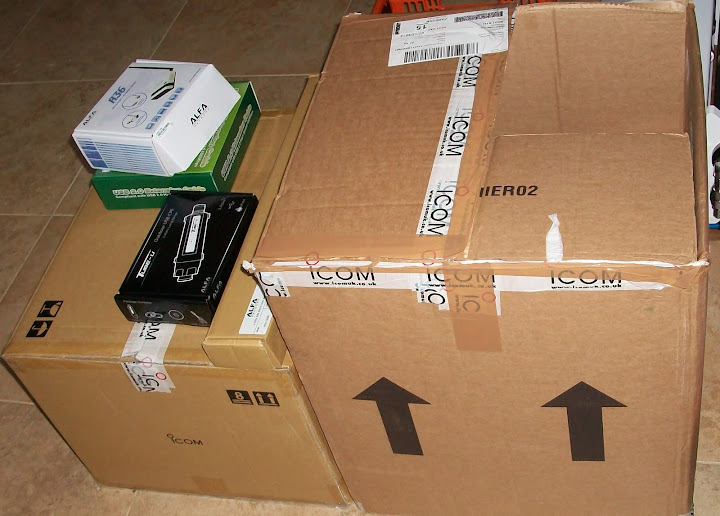
And our selected WiFi solution sits on the SSB box – the Alfa antenna system and WiFi router – a new product with the same specification as the usual marine systems at about 15% of the normal cost. Appears to be well constructed for external envionments and with a 190g antenna weight easy to mount.
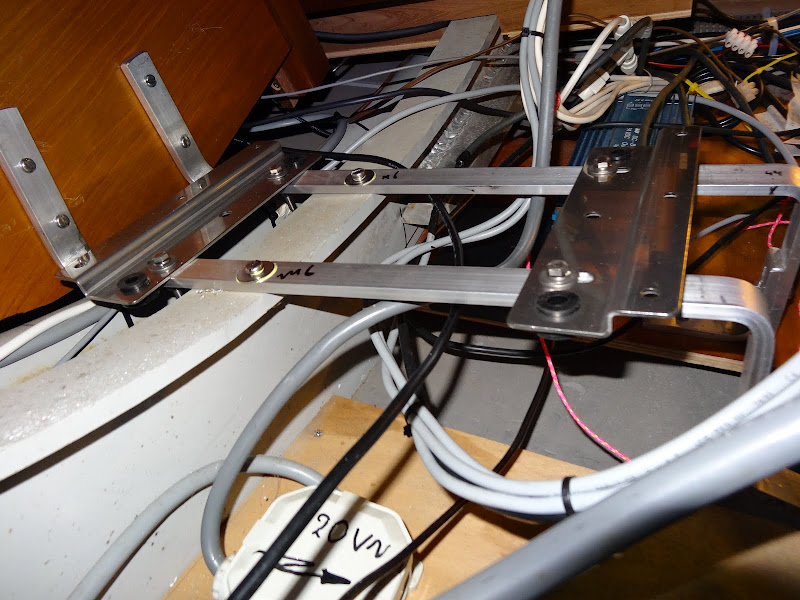
Making the aluminium SSB mounting frame with some artistic bending under the keel. It’s slow going in winter; everything is taking longer with the short days but fortunately it has been mostly dry with temps of 2 to 10 degs C.
Attaching brackets to the hull cross-beams

SSB frame installed
Main SSB unit installed with wires to tidy away to avoid the heat as this unit can operate at 125 deg C.

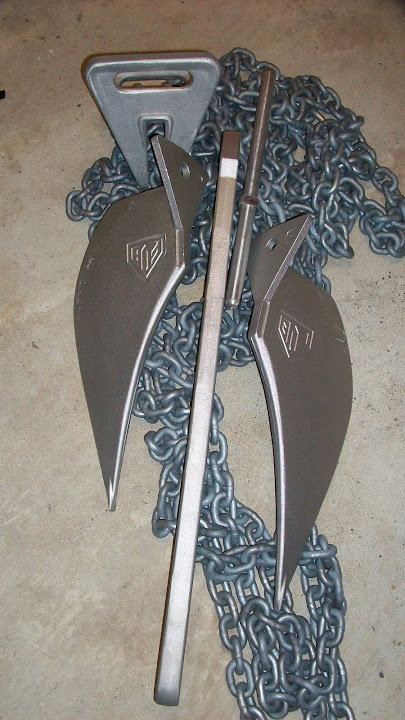
Kedge Anchor, chain and warp
This is an amazing anchor solution where space and physical handling powers are limited. The anchor assembles in seconds and is light weight for it’s size. The 19m of 10mm chain alone weighs 100lbs plus 50m of 20mm warp makes this enough for one person to manage. We have back spliced the nylon rode to the chain
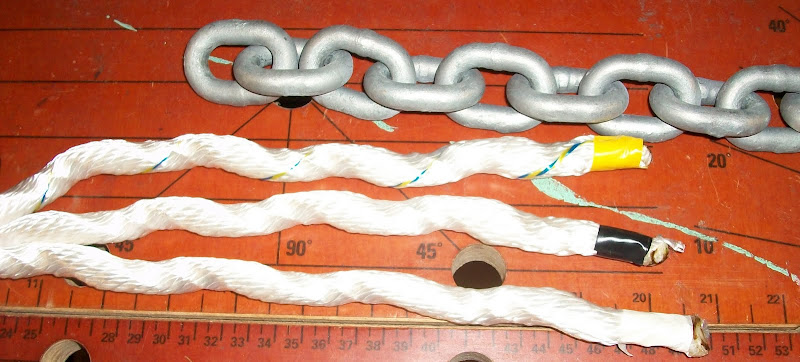

The FOB Light anchor is available from Calibra Marine and packs away into a tiny bag with minimal weight but we expect great holding power – adjustable angles for sand and mud – but when packed away looks like an anchor that hates both sunlight and garlic – unleash the vampire kedge


Get some charts !?!


ARC2013 – the Final Count Down continues on the ‘Last 6 Months Preparation’ page under ARC 2013 link in the banner.